Bubbles in the brickwork
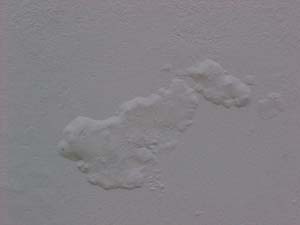 | Cause 1: These may occur when aqueous spackle is applied in the exterior because the product is suitable only for interior surfaces. Correction: Remove by scraping all aqueous spackle. Apply Couvertek, repair paste for the exterior. Repaint. Cause 2: The repainting on poor quality paint or humidity in the new paint can seep into the older paint and cause bubbles. Correction: Scraping, sanding and removing the affected areas. Apply one coat of Pliolite / Multineuce Primer. Repaint. Cause 3: This occurs when the dust is not eliminated after sanding the putty or when the paint was not properly diluted. Correction: Sanding and scraping loose parts. Remove dust. Apply one coat of Pliolite sealer in the exterior; sand and repaint. |
Calcination
These are spots that appear on painted surfaces, causing peeling or destruction of plastic paint.
There are generally two types:
Cause 1: The natural alkalinity of the quicklime and cement that makes up the plaster. This alkalinity, when in the presence of a certain level of humidity, reacts with acid in certain types of emulsion.
Correction: Scraping, brushing or sanding the surface, removing any loose parts. Apply one coat of Imperneuce and Pliolite primer. Apply finish.
Cause 2: The paint deteriorates due to weather conditions.
Correction: Scraping, brushing or sanding the surface, removing any loose parts. Apply a coat of Imperneuce and Pliolite primer. Apply finish.
OBS. In the case of new plaster, one must await for it to dry / cure (at least 30 days).
Cavities
Cause: These occur when unsuitable solvents are used in the dilution, or because of contamination of the paint or painting job material or surfaces because of grease, lubricants or water etc..
Correction: Remove all paint film and apply the paint system.
Separation
This is the stripping of paint from the surface together with parts of plaster, making it crumbly:
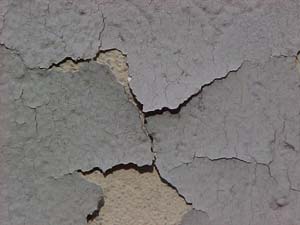 | Cause: This occurs when the paint is applied on the surface of uncured new plaster or when there is humidity. Correction: Repair loose parts. Correct deep imperfections in the plaster. Apply a coat of Pliolite primer. In the case of plaster in a critical state, as a first solution apply a coat of Imperneuce. OBS. In case of new plaster, one must await for it to dry / cure (at least 30 days). |
Efflorescence
Whitish spots appear on the painted surface
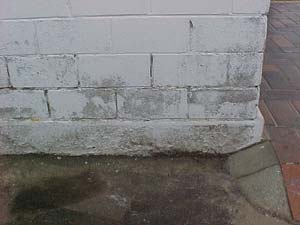 | Cause: This happens when the paint was applied on wet plaster or due to infiltration. This is due to humidity migration from the interior to the exterior on new or old plaster walls, cement, asbestos cement, bricks, etc.., migrating soluble salts. Until the humidity and soluble salts have not been totally eliminated, the situation will continue. Correction: Eliminate any infiltrations. Wait for the surface to dry. Scrape the affected surface. Apply a coat of Imperneuce or Pliolite primer. |
Corrugation
Whitish blemishes appear on the painted surface:
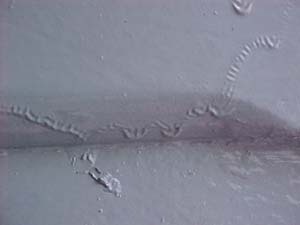 | Cause: This occurs when the coats of paint are applied too thickly, or when the surface or environment where the application is done is too hot. Correction: Remove all paint and apply it again. |
Microcracks
These are narrow, shallow fissures without continuity.
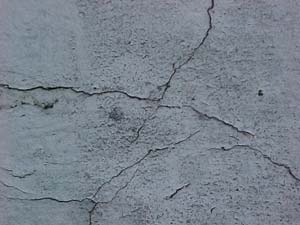 | Cause: Insufficient hydration time of quicklime before the application of the plaster or thick layers of thin paste. Correction: Sand and scrape the surface, eliminating dust, loose parts etc.. Apply a coat of Imperneuce / Pliolite Primer. Apply three coats of Neucecril - 100% acrylic coating. |
Yellowish stains on walls and ceilings
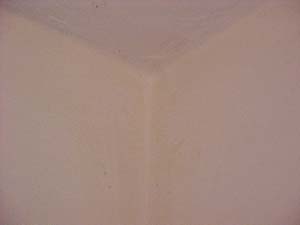 | Cause 1: Fats, oils, cigarette smoke (nicotine) or pollution. Correction: Rinse the surface with a water solution and ammonia-based detergent (eg. Bleach). Let it dry. Repaint. Cause 2: In the case of a plaster surface, they are due to the extraction of soluble substances from plaster, from humidity. Correction: Sand. Remove dust. Apply a coat of Multineuce primer. Repaint. |
Stains caused by raindrops
These are spots that appear on the newly painted surface due to isolated raindrops.
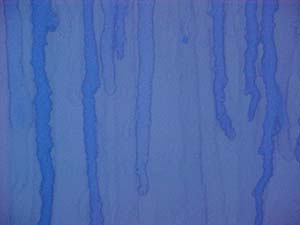 | Cause: Raindrops cause the extraction of soluble substances that emerge and stain the paint film. Correction:Wash the entire surface with water. OBS. It is important that the washing of the surface be done as quickly as possible, as the spots disappear after a few days; the time for drying / curing the latex paint is 20 days. |
Stains and delays in the drying of wood
Cause: This can occur when the painting was done on wood with caustic soda or remover residue used in the previous paint job.
Correction: Remove the paint. Wash the surface with water in the case of caustic soda. Wash the surface with water / cellulose diluent in the case of residue remover. Wait for the complete drying of the surface. Repaint.
Mold, mildew or fungi
These are spots that appear on the newly painted surface due to isolated raindrops.
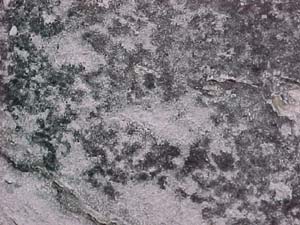 | Cause: These are a group of living plants which grow in favorable conditions, especially in warm and humid climates that are poorly ventilated and poorly lit. They produce the darkening of the paint film and decompose it. Correction: Wash the surface with the NEUCE Disinfect Solution, constantly wetting the surface with the solution for a period of 6 hours. Rinse the surface with water. Allow to dry. Repaint. |
Saponification
These are blemishes that appear on painted surfaces causing undue delay to the drying of the enamels and oil paints, causing the surface to be sticky.
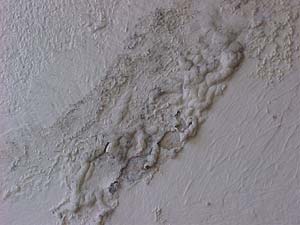 | Cause: In case of new plaster, one must await for it to dry / cure (at least 30 days). Cause: This is caused by the natural alkalinity of the quicklime and cement that makes up the plaster. This alkalinity, in the presence of a certain level of humidity, reacts with the acidity of some types of resin. Correction: Remove the paint using paint remover and wash the surface with cellulose thinner. Apply finish. OBS. In case of new plaster, one must await for it to dry / cure (at least 30 days). |
Cracks
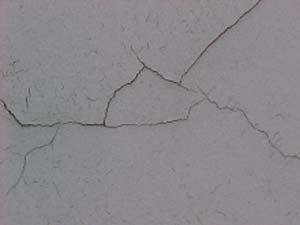 | Cause: In general, they are caused by the structural movements. Correction: Open the crack. Brush to remove dust. Apply a coat of Impersílico. Apply Couvertek exterior repair paste. Apply a coat of Pliolite primer, attached to nylon fabric. Apply three coats of Neucecril - 100% acrylic coating. Repaint. |
Cracks and poor adhesion on wood
Cause: These occur when aqueous spackling is used in the correction of imperfections in the wood, as the product is suitable for the surface of the plaster.
Correction: Remove the spackling. Apply a coat of universal binder. Sand and remove dust. Correct imperfections with Oily Bitumen for wood. Sand. Remove dust. Apply a new coat of Universal binder. Sand again. Repaint.


